How to Format & Upload a Squarespace Banner Image
Whether you want to use Squarespace’s banner capabilities to upload an image or a colored background, this post is for you.
If you’re not familiar with banner images and how they’re different from other images you can add inside Squarespace, it’s this: they span the full width of the page.
In this post, I’m breaking down how to choose a template with banner images, how to optimize the image size before uploading it, how to upload it to Squarespace, how to alter its height on your screen, and how to change the tablet/mobile view.
Picking the right template
This step of the website design process is often times overlooked. Templates inside Squarespace 7.0 (7.1 is currently rolling out as I write this post) need to be chosen based on functionality and capabilities, not looks.
For example, a health coach may go into the Squarespace template area and see a website that showcases a yoga studio and decide that that must be the template for them. This is not how you want to choose your template.
The reason I mention this is because not every template allows banner images. For that reason, you need to do your research before building your website.
In Squarespace 7.0, each template fits inside a family, and the Brine family is known to be the best to choose from.
I love using the Rally template for my website design clients, and you can see from my portfolio just how customized I’ve been able to make them.
Recommended Squarespace banner image size
If you’re wondering, “what size should a Squarespace banner image be?” then keep reading.
Before uploading your image inside Squarespace, you want to make sure it’s high enough quality. It’s recommended that your banner size is no wider than 2500 but no smaller than 2000, or else they’ll appear blurry. That’s the best size for banner images in Squarespace.
If you’re on a Mac, you can check this inside your Finder.
Condensing the image file
Condensing the image size of your banner image is very important because it can slow down your site tremendously, which is not only bad for SEO purposes, but also user experience.
I do this in two different steps.
1. I open the image on my Mac.
Then I go to Tools - Adjust Size.
I adjust the width to a maximum of 2500. Most times, high quality images are between 3000 and 5000, so it’s important to reduce the size.
For the example above, I condensed the image to 2200 pixels wide. It converted from 8.3MB to 1.1MB.
That’s a BIG difference, but there’s one more step.
2. I use a tool to reduce the image size again, but without compromising quality.
Even with condensing your image from step 1, it could still be a large file, probably 1.5 - 3MB.
We want to aim for 500KB image size.
To achieve this, I use JPEGmini and TinyPNG, depending on the type of file I have.
JPEGmini has a free trial and TinyPNG is free for up to 20 images at once.
Trust me, these tools are huge game changers.
After dragging the image into JPEGmini (it downloads as a program on your desktop), the image went from 1.1MB to 574KB.
This is much better, and now it’s ready to be uploaded.
Quick SEO tip - change the file name to include keywords before uploading.
How to upload a banner image
In addition to adding your own photos, Squarespace now integrates Unsplash photos so you can pull in their images.
I’m not 100% how they’re formatted when you upload their images, so it might be best to grab your photos directly from Unsplash itself and then follow the above directions to ensure that the image is as small as possible without ruining the quality.
To add a photo to an index page…
You need to hover over the top area of the page you’re on and click Banner (see image below).
If you don’t already have an index page, click the + icon under navigation and add an index page. You’ll see “+ add section” below that. Click there to add a new page.
To add a photo to a regular page…
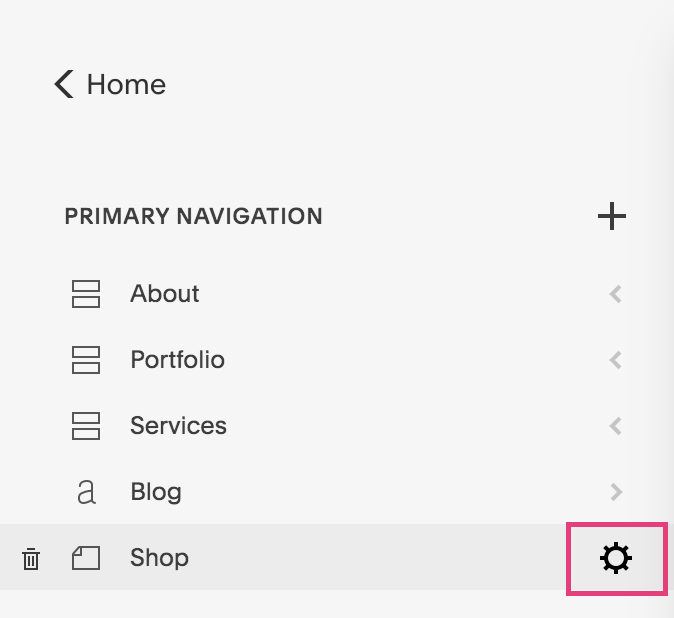
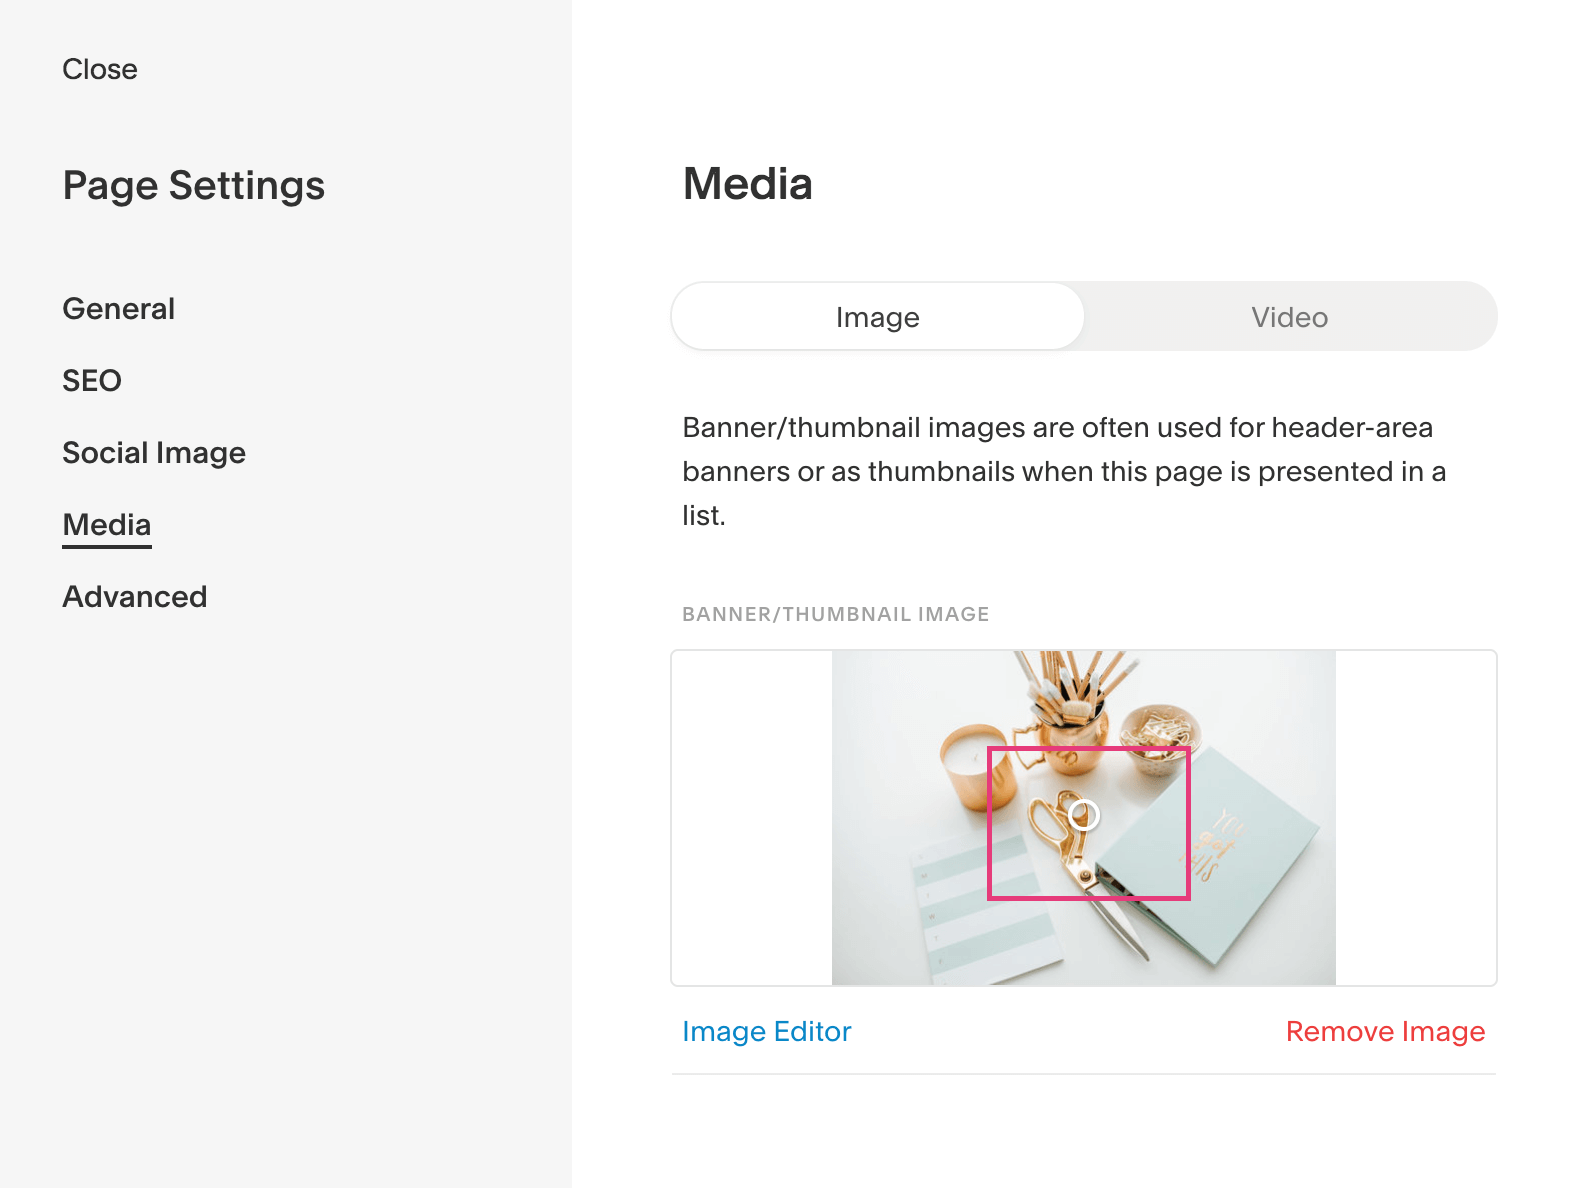
You need to click on the gear icon, click Media, then add your image there.
How to change the banner height size
There are many different ways to change the height of a Squarespace banner image to make it smaller or bigger. In Brine, you simply add spacer blocks to the banner image area.
You can click the video below to get a full walkthrough of how to change the banner size inside Brine, specifically Rally.
Note: in other templates, you may have to add line breaks in the description of the image under settings.
Changing the focus
On every image under its Page Settings - Media, you’ll notice a small circle. This is your focal point.
Wherever you drag this is where a condensed screen (like a mobile or tablet view) will show.
To view your page in mobile or tablet view, you can click on the little arrow dropdown at the top left of your screen on Squarespace 7.0 and top right in Squarespace 7.1.
There you have it! That is how you would change your banner image height in the Rally template, and for many of the other templates within the Brine family.
To review, you want to:
Pick the right template
Reduce the file size manually and using a tool
Upload it to Squarespace
Use spacer blocks to adjust the banner height (Brine templates)
Adjust the focus so it looks great on table and mobile
Looking to uplevel your current Squarespace website so you can attract more dream clients?
Click below for more information!
Looking for more Squarespace tips? You’ll also love…


